
Overview
- You can create and add a user to groups
- For students who are learning a certain subject
- For teachers to share information
- Most useful with Discussions as you can add user groups to certain
If you want to know about Creating a Discussion or Understanding the Community/ Messaging Section, please click the links!
What is Covered
- Finding the User Groups List page
- Navigating the User Groups List Page
- Creating a User Group
- Linking User Groups
- Useful Links
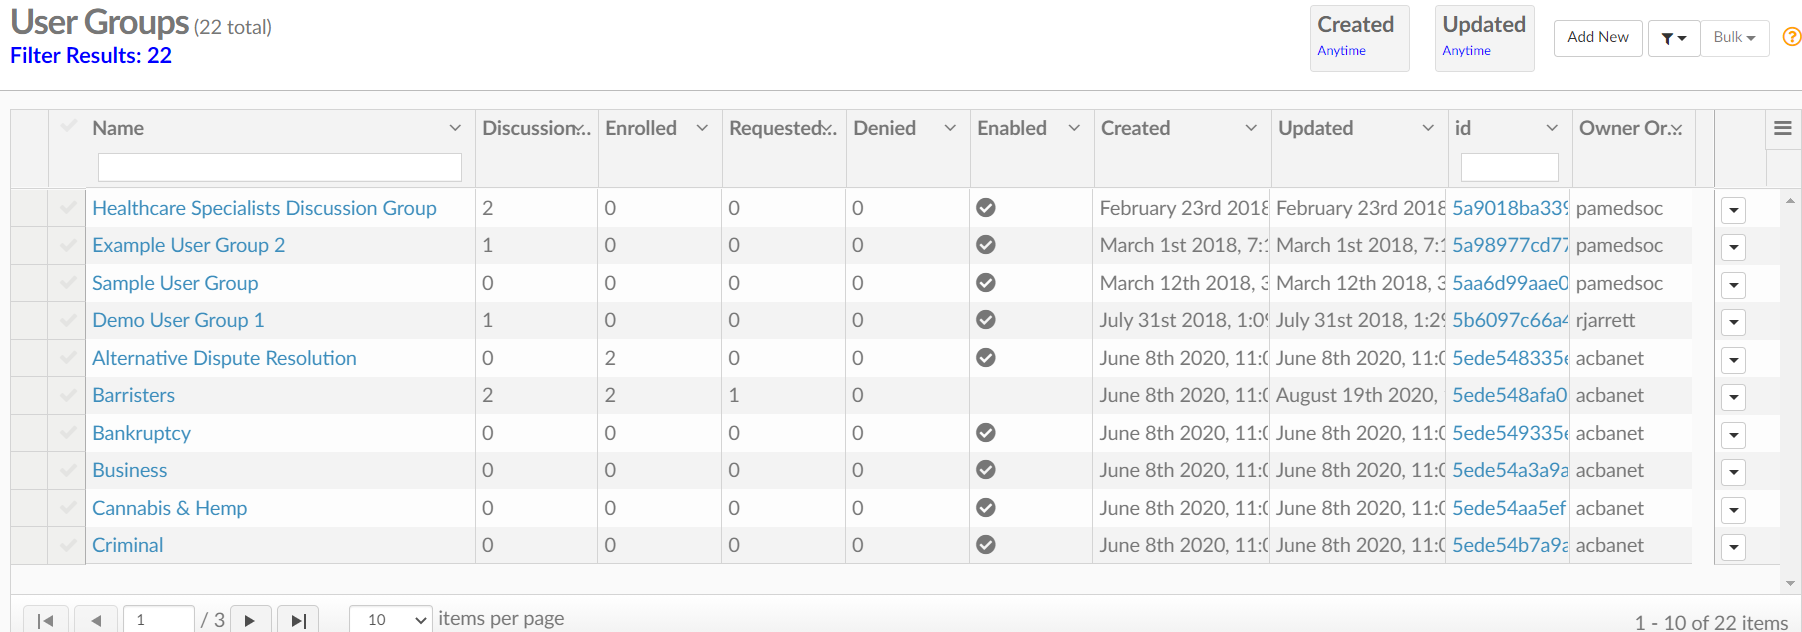
Finding the User Groups List Page
Go to Menu--->Community/ Messaging---> User Groups
Navigating the User Groups List page
- Name
- Discussions- How many discussions are linked to the user group
- Enrolled- How many of the linked users are enrolled in a course
- Requested- Users that have requested access to the user group
- Denied- how many users were denied access to the user group
- Enabled- If the user group is allowed to register or not. (if registration is disabled there will be no checkmark)
- Created- When the user group was created
- Updated- When it was last updated
- ID- Its unique creation ID
- Owner- Who created the user group
Creating a New User Group
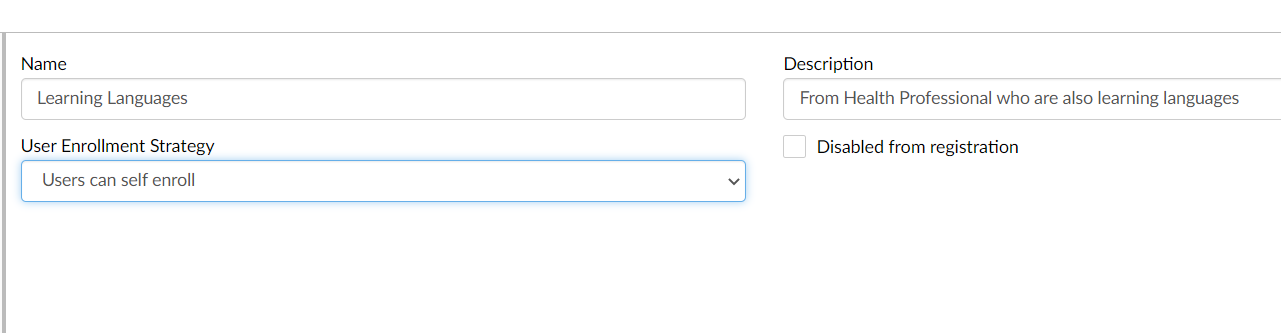
- In the top right-hand corner select the ADD NEW button
- Fill in the necessary information
- Name
- Description
- User Enrollment Strategy
- Self-Enroll
- Request enrollment and must be approved by an admin
- no self-enrollment and can only be added by an admin
- Disabled from Registration
- Can the users register or not?
- SAVE
Linking Users and Discussions to User Groups
- Link Users
- GO to the Users tab
- In the right-hand corner select the LINK TO button.
- Press the square plus button to add a user to the user group.
- Link Discussion
- In the discussions tab, select the square plus button on the right-hand side of the NOT LINKED box to link a discussion.
You now know how to create a User Group. To learn about creating a discussion please view our other tutorials.